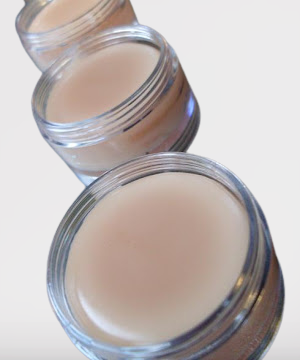
Chapstick/Lip Balm - DIY Recipe
Have you ever thought of making Chapstick or Lip Balm? You want to make it? Then try this homemade Chapstick/lip balm recipe. It is easy, all-natural and a sustainable alternative to store-bought chapstick. Give it a try – and have fun exploring your creative side.
Chapstick makes a great fun DIY gift. This recipe only takes a few minutes to make and it is so creamy and soft your lips will LOVE it. You can also add shimmer to add some extra bling to your recipe to brighten your day.
You can get creative with different natural scents and flavors. So much FUN! DIY gifts are not only fun to do with family, kids or friends but they can save you some cash.
*This post contains affiliate links. If you use one of my links to make a purchase, I may make a small commission but it won’t raise the price for you. Read my full disclosure here).
Why bother making your own chapstick? Well, here are a few reasons:
Store bought ones often contain chemicals that actually DRY OUT our lips, forcing us to continually apply more.
Save some $$.
Have fun with friends and family or both!
Homemade Chapstick Recipe!
SUPPLIES:
Pipettes
Chapstick containers or pots
Double boiler or if you do not have one use a pan and a glass or tin container to melt ingredients in. (Preferably a container that you are going to use for crafts in the future).
INGREDIENTS:
2 TBS beeswax
2 TBS shea butter or coco butter
2 TBS coconut oil
Essential oil of your choice.
A double boiler or something you can melt the materials in over a pot like a glass bowl, and a spatula you don’t plan on using for cooking again.
If you want some shimmer and a little color, you can try adding some natural mica powder.
If you’re looking for another DIY gift, try making these DIY Lotion Bars using the same ingredients.
DIRECTIONS:
Heat the pot of water on the stove set to medium heat.
Fill all the ingredients into the double boiler or glass and put the glass into the pot of hot water.
Melt the beeswax, shea butter, and coconut oil in a bowl over a pan/pot of boiling water. Use the double boiler pot. If you do not have one add water to an old pot and use a Pyrex container to mix ingredients in.
*Stir the contents until they become watery in consistency.
Turn off the heat, but keep the mixture heated over the pot or else it will start to harden fast!
Add the essential oils and color (only if you want to get creative).
Use a pipette or a dropper to fill your chapstick containers.
*When the chapstick cools in the container it tends to “sink in” a little so going back through and topping each container off gives your chapstick the professional completed look.
Line them up on the counter when full to let them harden for a few minutes and go back and “top” off.
Let the full chapstick containers sit on the counter and cool for a few hours before moving or putting on the caps.
Let the chapstick mixture harden in the fridge for a couple hours or overnight. Once hardened, the chapstick no longer needs to be stored in the fridge.